Louis Lehmann/ TORQ. BUILD JOURNAL
CONCEPT — APR 2026 EST. SEPT TARGET
Project № 003 / Personal Hardware

The grip
I couldn't
buy.

A modular rotational grip trainer — crush, rotation, and thick-grip in one desk-sized device. This is the build journal: what's real, what's only rendered, and what's still in my head.

TORQ rotational grip trainer concept render
Status
Concept Exploration
Stage
Pre-prototype
Driver
Spartan Race · Sept
Approach
Concept-first
01 / ORIGIN

The itch behind the idea.

// CONTEXT
// PERSONAL
// OBSTACLE-RACE-PREP

I have a Spartan race in September, and in obstacle racing grip is what fails first. Monkey bars, multi-rig, rope climbs, sandbag hauls — every obstacle runs through your forearms. You can have the cardio of a triathlete and still fail because you couldn't hold on for fifteen more seconds.

I've collected the usual grip gear — Captains of Crush grippers, a twister bar, Fat Gripz, a wrist roller. Each trains one dimension, they're scattered around the house, and I don't reach for any of them often enough to matter.

"What I actually want is one device that covers crush, rotation, and thick-grip — small enough to live on my desk, modular enough that swapping resistance feels like changing a lens."

So I started exploring — not building yet, just pressure-testing the idea before committing any plastic to it.

02 / PROCESS

From a sketch in my head
to renders.

STEP 01
Tool: Conversational LLM
Time: ~45 min

Conceptual sparring

I described the device in plain English — ab-wheel form factor, a central disc housing the resistance, two bars, swappable grip sleeves — and pushed on two questions: does this already exist? and what mechanism would actually work?

Four candidate mechanisms came out of it — torsion spring, friction disc, magnetic eddy current, viscous fluid damper — ranked by manufacturability against feel. The closest existing product is The Burn Machine; nothing combines all three modalities in one compact device.

Ranking the mechanisms out loud killed the two worst options early — before they cost anything.
STEP 02
Tool: Image generation model
Time: ~30 min, 4 prompts

Externalizing the picture

Four renders, each for a different job — a hero shot, an exploded view, a blueprint, and a use-case triptych.

The blueprint is the one to be honest about: it's not a real engineering drawing, it's a render that looks like one. The dimensions are internally consistent enough to brief a manufacturer — but no real CAD exists yet.

Exploded view render of the TORQ device
FIG. 02 — EXPLODED VIEW, AI-RENDERED
STEP 03
Tool: Web research agent
Time: ~20 min

Reality-checking the market

Before getting attached, I sanity-checked the market. Grip strengtheners are about $812M globally at a 5.4% CAGR, ~$153M in North America, with online retail roughly 40% of sales.

Real but small — not a unicorn, not a wasteland. The kind of niche a well-positioned product can hold without needing to be a hit. Good enough to keep going.

Fast to gather, slow to trust — every figure here still needs a primary source before it goes in a pitch.
STEP 04
Tool: Survey of CAD-AI tools
Time: ~15 min, deferred

Pricing the prototype path

I priced the prototype path. Adam CAD turns text into parametric models and print-ready STLs; Zoo Design Studio is more capable but steeper. Either gets me from description to printable part.

The plan: model each part (disc shell halves, grip sleeves, axle), print them, source the spring and bearings from McMaster-Carr, and assemble v1 for under $35 in materials.

STEP 05
Tool: Slide generation agent
Time: ~20 min

Packaging the story

I also drafted a 16-slide Kickstarter deck — problem, solution, market, unit economics, competition, manufacturing, use of funds — with real estimates and assumptions flagged.

Not because I'm launching tomorrow, but because drafting it forces the unit-economics math early and exposes exactly which costs still need real quotes.

You can't write the pricing slide without your COGS, or the COGS slide without facing the BOM. The deck just forces the order.
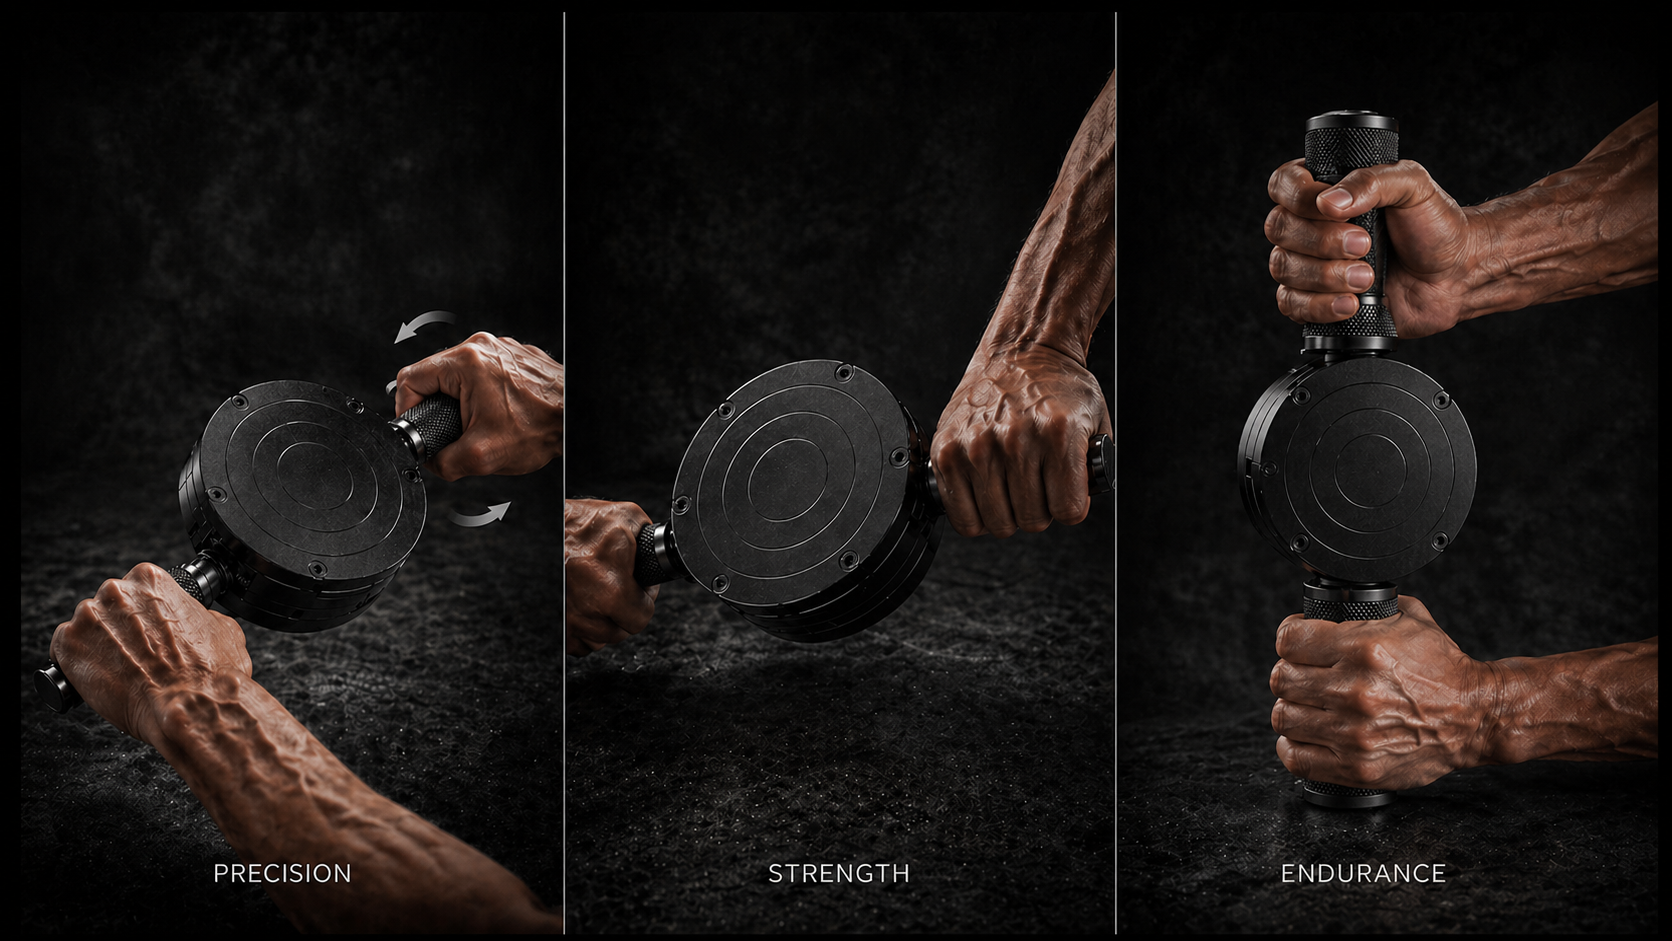
TORQ device used in three different grip positions
FIG. 03 — Use cases: Precision, Strength, Endurance
Three grip diameters. One device. Same five-second swap.
03 / THE STACK

The build toolchain.

CONVERSATIONAL LLM
Concept & research
Concept refinement, mechanism ranking, market research, BOM estimates, deck drafting. Most useful when pushed to argue both sides, not just agree.
→ Used
IMAGE GENERATION MODEL
Renders
Four prompts, four renders — hero shot, exploded view, blueprint, and use-case triptych. Convincing enough to communicate the idea; not engineering-grade.
→ Used
ADAM CAD / ZOO DESIGN
Parametric modeler
Text-to-STL for individual parts. The prototype-phase tool — to be tested once modeling goes from plan to print.
→ Planned
SLIDE GENERATION AGENT
Pitch deck
A 16-slide deck — charts, market data, competitive matrix, reward tiers. A solid first draft, not ship-ready; the gap is editing, not authoring.
→ Used
Engineering blueprint of TORQ device
FIG. 04 — AI-rendered orthographic projection
Convincing enough to brief a manufacturer. Not yet real CAD.
04 / WHERE IT STANDS

Honestly: not built. Yet.

DONE

Concept & artifacts

  • Mechanism options surveyed and ranked
  • Four product renders generated
  • Pseudo-blueprint with consistent dimensions
  • Market sized, competitive landscape mapped
  • Unit economics drafted (estimates, not quotes)
  • 16-slide pitch deck and one-pager produced
UP NEXT

Physical prototype

  • Model parts in Adam CAD or Fusion 360
  • Print disc shell halves in PETG
  • Source steel rod, bearings, torsion springs
  • Assemble v1 — BOM under $35
  • Test ergonomics and resistance feel
  • Iterate on sleeve lock mechanism
DEFERRED

Production path

  • Trademark search for working name
  • Provisional patent filing
  • Alibaba RFQ for actual manufacturer quotes
  • Validate unit economics against real costs
  • Pre-launch landing page + reservation funnel
  • Kickstarter campaign decision
// CLOSING
// THE POINT

This is on my portfolio because it's an honest snapshot of how I scope an idea before committing to it: get to a render, a market check, and a BOM fast enough that the only thing left to decide is whether it's worth building.

Cheap concepts change the bar. When "here's what it'd look like and cost" takes an afternoon, fewer ideas die at the brief stage — and the ones that move to a physical prototype have to earn it on conviction, not novelty.

"My Spartan is in September. TORQ may or may not be on my desk by then — but I know exactly what it would take to get it there."